How To Make Your Own Navigation Mesh For Frame
By Guest Author Uli Plank
So, it all started for me with a Navigation Mesh (Nav Mesh)we needed in a very complex environment, a 3D model we bought for a cultural project.
It is very detailed with a huge texture atlas and over 4 million polygons. Of course, having over 360 MB, it needed to be compressed for Frame. This took a long time, but finally succeeded. What didn’t succeed was the generation of the Nav Mesh.
If this has ever happened to you, you may have noticed that there’s no further message than "Sorry, we weren't able to map out the walkable areas in your environment.“ So what? I didn’t want to give up on this and started to check the model for whatever might have caused the issue. First thing I noticed were a lot of normals not pointing in the right direction, so I cleaned that up. But still to no avail. Of course, my origin was in a convenient place of an area where you should be able to spawn and start moving around. The size of the model was right too, at about 150 meters wide it’s still within limits.

Now, for testing purposes, I tried to delete all complex geometry where you shouldn’t be able to move anyway and tried again. No joy. Finally, I killed the large texture atlas, so it would be a single color only and this brought it down to less than 50 MB, so it shouldn’t even need compression.
Nope, still no Nav Mesh generated. But then I remembered that you can make your own, separate model for that, as mentioned here. So I went back to my reduced model in Blender, which was faster to handle since I had killed much of the non-walkable areas. It was a bit inconvenient, since it was one single, linked object. But with a decently fast machine I could handle it without first separating the parts.
.jpg)
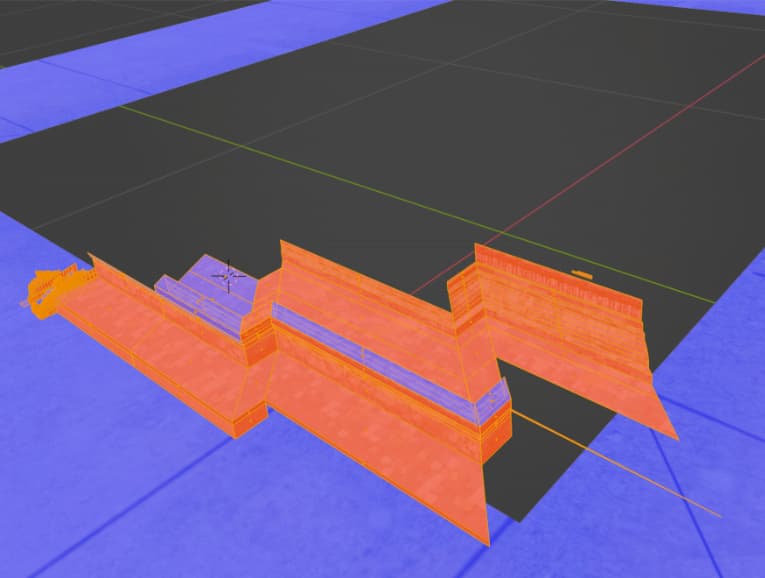
Mapping out the Nav Mesh from a complex model can be quite time consuming. Most of it could be handled by just selecting appropriate areas of the original model, duplicating, and separating them from that model. Our model posed a few challenges, though. When one area which should have been walkable stopped us, I found that two polygons were unconnected. That was probably the original reason why automatic mapping didn’t succeed, there must have been more of these.
It’s essential to have connected polygons over your whole Nav Mesh. A separate mesh doesn’t show anyway, but make sure that everything is neatly connected. This can be done with a Mesh Clean Up and 'Merge by Distance‘. If you work in several parts to test your mesh, take care that you have joined the duplicates with parts you’ve already made. If those parts don’t end up within one object, cleaning up by merging vertices will not work.
The next thing that stopped me, or rather my Avatar, are stairs where the steps were too high. I didn’t bother to find the limit by trial and error (up to 30cm per step still work). But it works if you replace the stairs with a plane at an angle. It still works with pretty steep angle, like 45 degrees. Our model is similar to an ancient pyramid and getting pretty steep on the higher levels.
Where stairs are too steep, make ramps. So, now we had our additional model. If your environment is as heavy as ours, take care to delete all materials with textures from the Nav Mesh, since the added size might get you over the limit for uploads. The Nav Mesh will not be visible anyway, so just give it a plain BSDF material.
.jpg)
Our pretty complex Nav Mesh has only 120KB. If your Nav Mesh is also much smaller than the environment, you can test it quickly by renaming that file to anything but__nm.glb, like __xx.glb. It’ll load fast and you can review it for any inaccessible areas. And finally, note that the text under "Upload Custom Environment“ says "Select file(s)“. That plural matters, it’s not enough to have the Nav Mesh file in the same folder with the right name, but you need to load both files together.
Enjoy!


