The Text Area Asset and Using APIs
With Frame, we try to make it as easy as possible to create your own multi-user corner of the metaverse for you or your organization.
We know how important fancy assets like 3D models and 360 photos are for customizing your space, but it's important not to overlook some of the fundamentals. The topic of this blog post is a classic, time-tested way of communicating meaning - text.
After going over the basics of text in Frame, we'll get into one of the new more advanced features in our new Text Area Asset: adding an API route and displaying the result of the API call on the Text Area. Dynamically updating data in the metaverse? Go for it.
Text Label
We have two text assets in Frame, the Text Label and the Text Area.
The Text Label is simple and highly performant, so you can have a ton of them in your Frame without impacting its performance. That said, it has some limitations. It can only do single-line text, and right now it's limited to English-only text.
I think it's great for buttons or simple office door tags and other labels. You can select the Text Label in Edit Mode (right click on it, or click the pencil icon in your toolbar, then click on it) to add a link to it. In the Edit Menu, you can also change its color, background color, or transparency.
.jpg)
Text Area
The Text Area was built to address some of the limitations of the Text Label, but it's built with different stuff. It's not quite as peformant as the Text Label, which is why we still wanted to keep the Text Label around for those that need just what it has to offer.
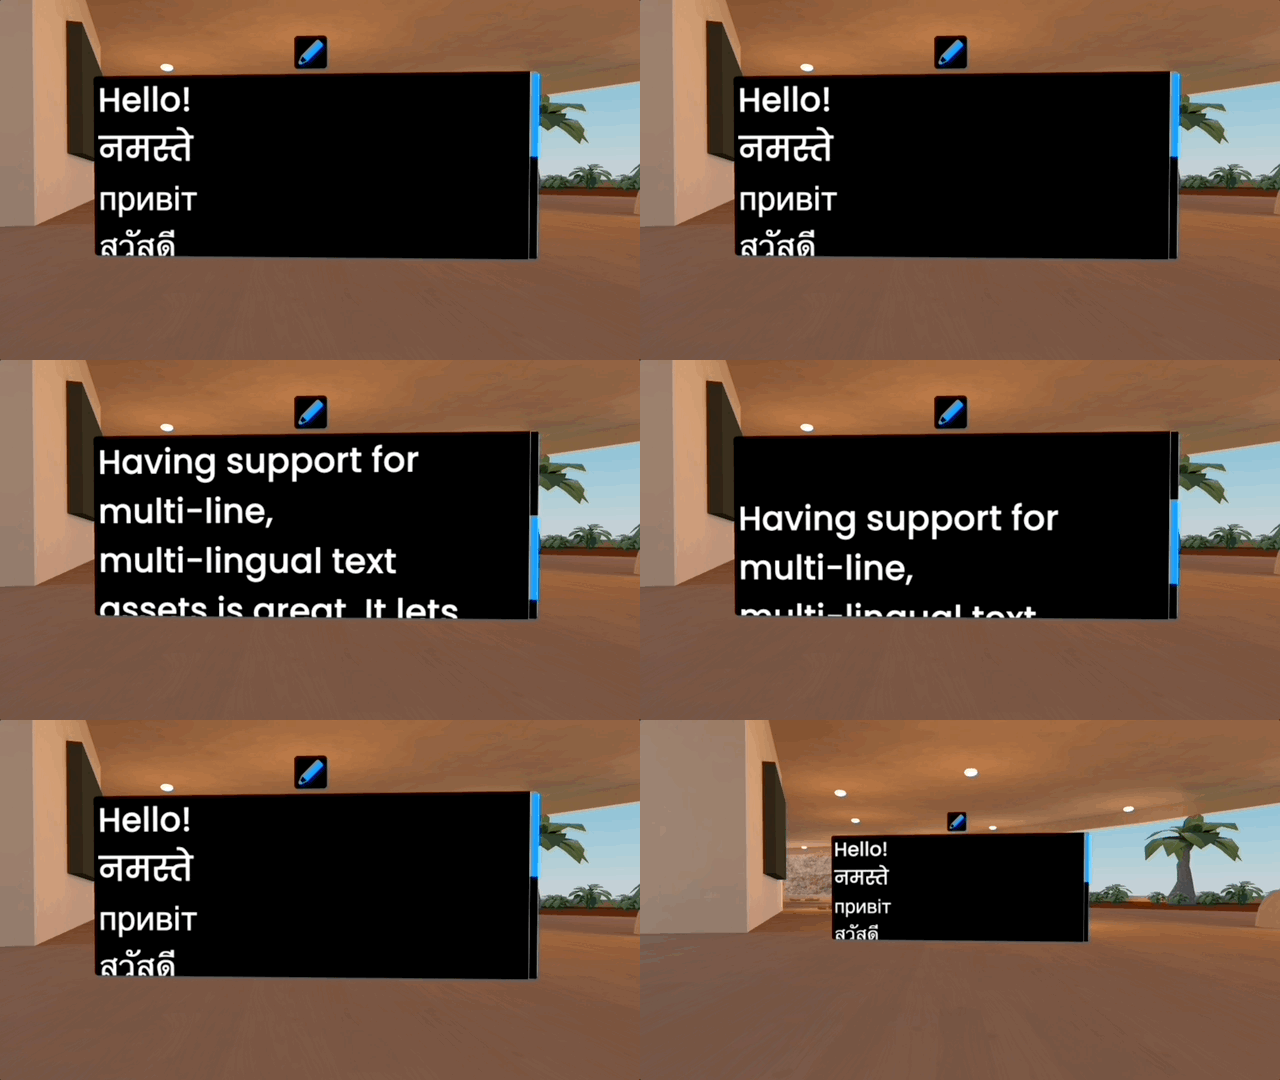
The Text Area can do multi-line, multi-lingual text. It doesn't yet have color-swapping options, but you can change the font-size and text alignment. If your text is really long, we'll make a scroll bar so that your viewers can scroll down to read it all.

You can select the Text Area in Edit Mode to see the full edit options, but if you're just adjusting the text then you can click the pencil icon floating at the top of the Text Area.
We'll be adding plenty of other customization options for the Text Area in the future. Now let's get into one of the exciting new features of it: simple API integration.
API Routes in the Text Area
.jpg)
If you click on a Text Area in Edit Mode, you'll see a switch at the bottom of the menu for "Use API Response". This will make the Text Area display the result of an API call instead of text that you set manually.
I'm going to simplify things quite a bit here. If you know generally how API calls work, just skip below to "Examples". An API call is basically a request you make to another service, specifically a service that has exposed an API that allows people to make requests to it and get responses back. The client (in this case, you) makes a request to a server, and data is received back.
For example, this could be a request to a weather API, a stock API, an API managed by your own business - there are TONS of APIs out there. Many of them are free but some of them require an API key and are part of a paid service.
That response you get from an API call can be in a wide range of formats depending on the API and what it's supposed to do. One common format is JSON (JavaScript Object Notation) because it's efficient, compact, standardized, and simple. JSON also plays nice with Javascript, which is why many web environments (like Frame) can work with JSON easily.
For now, we support API responses that send back either JSON or simple Text responses.
Once you put in the API route into the field for it, check below for the "VALIDATE API ROUTE" button. You have to validate the API route before you can save it to the asset. The validation step just makes sure that your API gets back a response in the format we need it.
Below the API Route field, you will also see a dropdown where you can pick how often you want the API to be called. If you are using an API with frequently updating data, maybe you want to set the interval to 10 seconds. If it's an API that doesn't have frequently changing data, maybe you don't need it to update it at all.
Each API request takes some bandwidth, so you may want to be cautious with how many frequently updating API requests you set up.
Examples
Random Word API
Here's the API route for a very simple "random word generator" API: https://random-word-api.herokuapp.com/word
Go ahead and paste that in the "API Route" field that you see in the Edit Menu when you select the Text Area in Edit Mode.
Then click the "VALIDATE API ROUTE" button. This checks to make sure that the API gets a response.
Then, in the Frequency dropdown, pick 10 seconds.
Finally, press the "SAVE" button to save your API route to the asset and display the response from it right on the asset. You should see a random word on your Text Area now. Here's mine:
.jpg)
Because I set the request interval to 10 seconds, I actually get a different random word on there every 10 seconds!
One thing worth noting is that each user in your Frame makes their own request - so each person may see a different random word if they are in there together. Most APIs are not "random" in this way, so when you are making a call to a weather API for example, everyone will see the same thing because everyone will be getting the same response.
Weather API
Let's look at another example, the weather. I found a free weather API at this big directory of APIs. The weather API has some documentation here, where they show you how to set up your API calls.
As they say:
A REST API to check the current weather.
https://goweather.herokuapp.com/weather/Curitiba
https://goweather.herokuapp.com/weather/{city}
So, it looks like you just put the city you want in the section at the end. I'll put in Rome and see what happens. Because the weather doesn't change too much, I'll set the update frequency to "just once". My final API route looks like this https://goweather.herokuapp.com/weather/Rome
Here's the result on the text area:
.jpg)
Notice that we strip out a lot of the formatting brackets and curly braces that you usually see in a JSON response.
There's quite a bit included in the response, like the forecast for the next two days, which is why it sets up the scroller so the user can scroll down. Also, the response itself doesn't say what is being shown, so I'm going to supplement this with a Text Label to help users understand what is being displayed.
That's looking much better now:
.jpg)
COVID Data
Finally, I found another easy API for COVID stats that didn't require an API Key here.
I scrolled down to the API section and saw that you could set up a route like this: https://covid-19.dataflowkit.com/v1/italy
You can replace the "italy" piece with a country of your choosing, and they have other API routes you can use to get info for the world and a few others.
I validated my API route, set the interval for "every minute", and saved it. Here's what I got, updating every minute in my little corner of the metaverse:
.jpg)
In Closing
These are just a few examples of APIs I found that worked nicely with this feature, but chances are your business might have their own API routes that are publicly exposed that you can use. This gets really interesting when you can pipe in data that is most relevant to you and your audience.
Perhaps you have IoT devices that are sending out readings that you display in a digital twin of the building with the IoT monitors. Maybe you have your own key metrics that you are able to query with APIs and display in Frame so you always have them in view, updating live.
Good luck with this feature, and let us know if you have questions about it and hello@framevr.io
We'd also love to know how we can improve the feature to make it more powerful for you. Good luck!
Note: sometimes when you pay for access to an API, your API route will include your API key so that the API provider can verify that you have access to the service. We know these API keys can be sensitive and you probably don't want them broadly shared. For this reason, only the Frame owner or the person who added the Text Area asset has visibility over the API routes, or can set a Text Area to use an API Route. You should exercise caution when using highly sensitive API keys.
You might Also Like


FRAME and the iLRN Conference: Immersive Poster Sessions
Poster sessions about VR - in VR. Meta!
Read More